Hello PDL pals, let's talk about creating custom PDL staging tables!
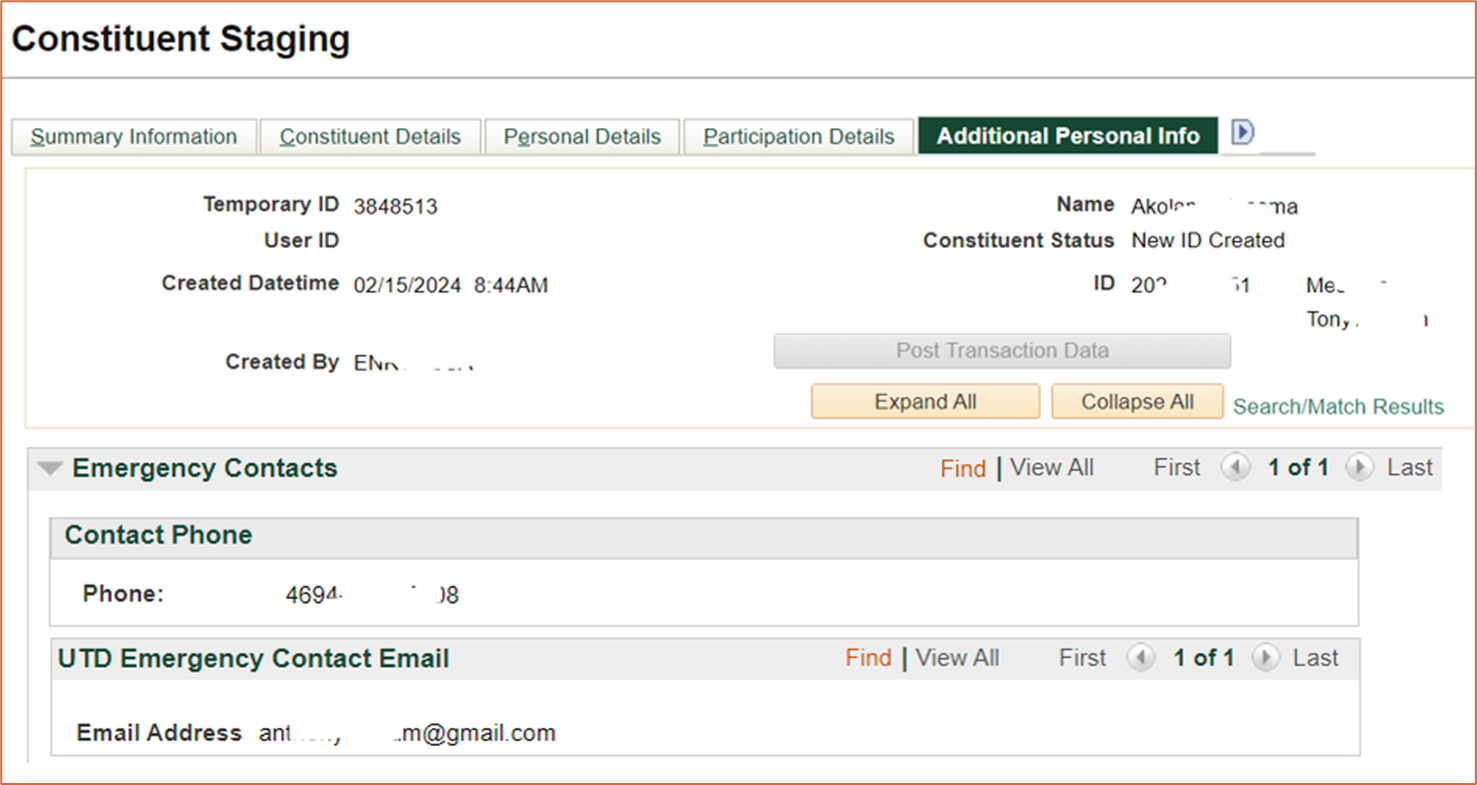
How PDL Staging Tables work

Why would we want to create custom staging tables?
- Allow us to expand beyond some limitations with current delivered processes, ex:
- Add multiple student groups from the same file, and to use the current date value
- Add multiple service indicators from one file
- Consolidate several processes together, ex:
- Add applicant affiliations and student groups using the same PDL as the application load
- Post to custom tables via PDL
This is a collaborative effort between functional and technical users, as it involves several steps that require access to Application Designer.
Steps:
- Build the custom staging record in Application Designer with the SCC_TEMP_ID field as a key, remove EMPLID as a key (Application Designer).
- Display the custom staging table data in staging (Application Designer)
- Add the new custom staging table to the Entity Registry so you can establish a parent and link it to the production record (within PeopleSoft)
- Add to Context (within PeopleSoft)
- Add to Data Update Rule (Within PeopleSoft)
- Add the File Mapping (within PeopleSoft)
Building the custom staging record in Application Designer:
- Locate the production record that you’d like to write to using PDL and do a Save As to create your own copy.
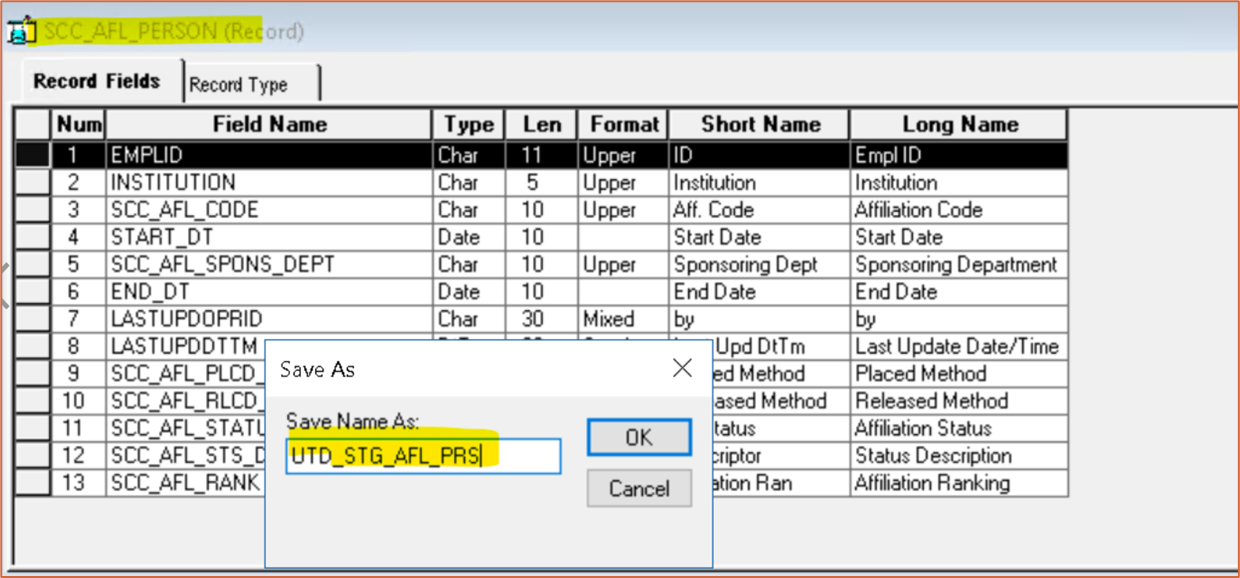 This will become your staging table
- Add the SCC_TEMP_ID field.
- Set the SCC_TEMP_ID field as a key.
- Remove EMPLID as a key
- Do a Build on your record.
Adding our custom staging record to a page so it’s visible in staging:
We’ve added some to delivered pages, and some to a new page we’ve created. We’ve added to both Constituent and Application Staging
Adding the new custom staging table to the Entity Registry:
Steps:
- Check 'Apply Data Update Rule’.
- Associate with Parent staging table
- You are now ready to add this to your Context, File Mapping, and Data Update Rule Entry to start using it!
Build:
- Go to Set Up SACR → System Administration → Entity → Entity Registry and Add a new value
- Fill out a Name. It'll generate an Entity ID for you when you save
- Entity Type = Staged Entity
- Prod Record = the production record
- Stage Record = the new record you created
- Element (XML) = the new record you created
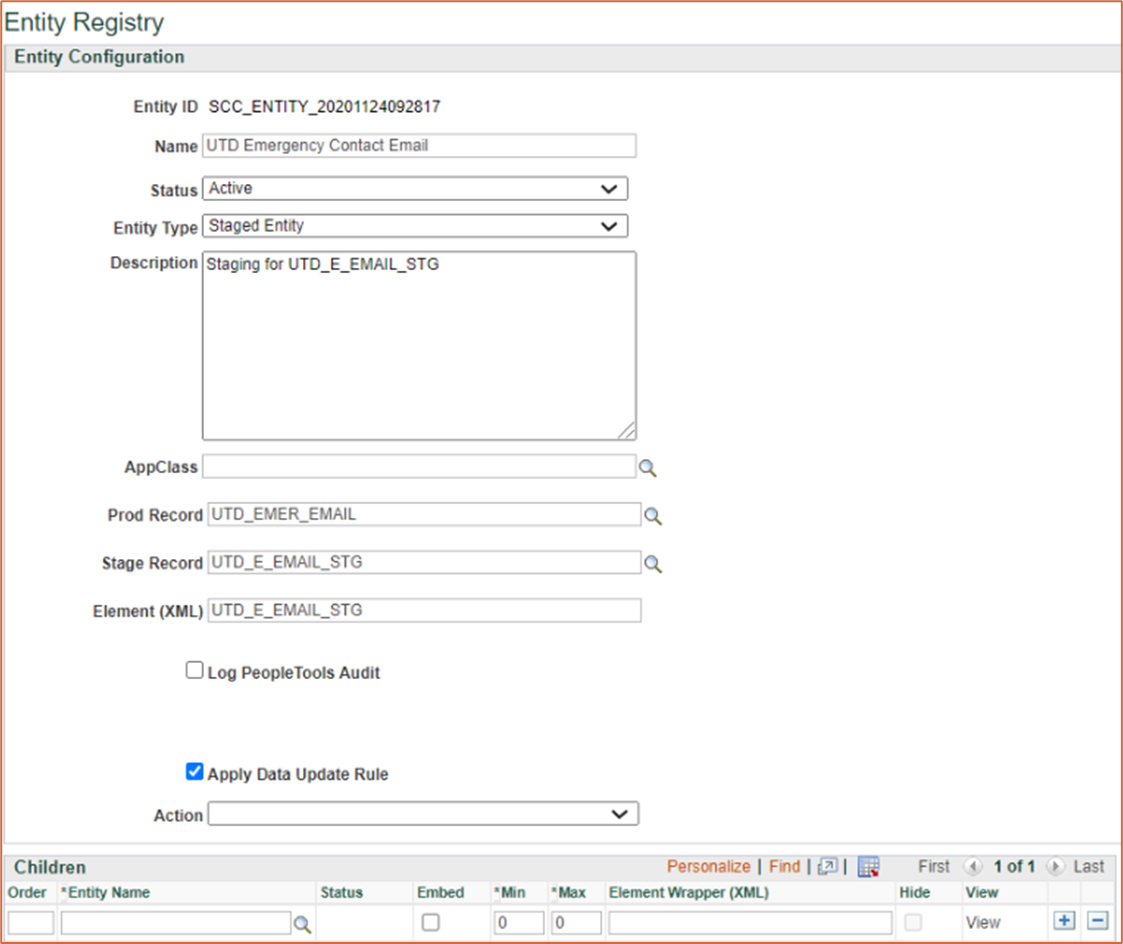
- If you select Edit Properties, you can view what displays in staging for this table, what is required in order to map to the table, etc.
- To associate your new entity with Parent Record Entity, go to the parent entity and add your new Entity Name as a child
- If you want to be able to set up how to update this record for existing IDs, you’ll want to select Apply Data Update Rule and Sync
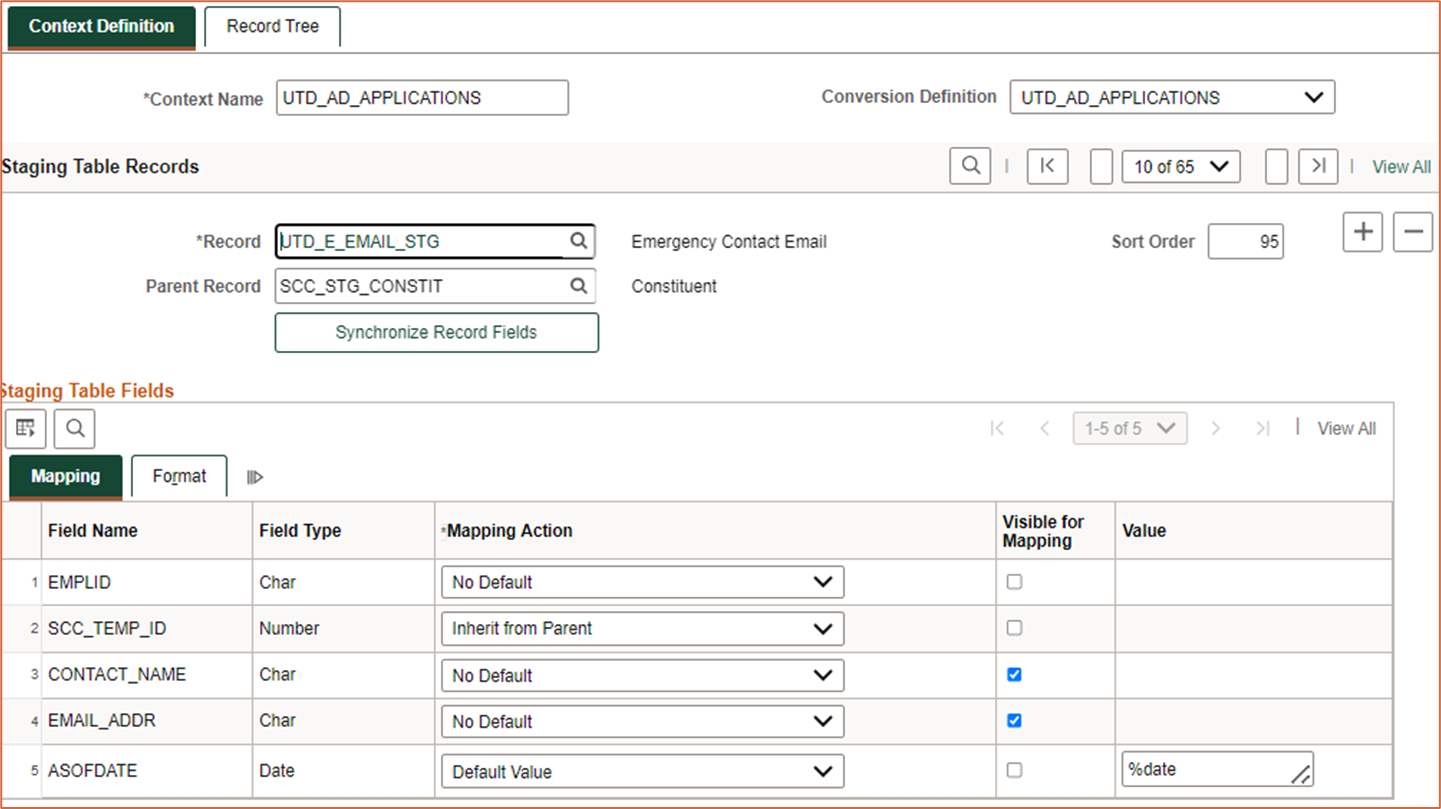
Adding to Context:
- Add the new Staging Record, and the Parent you associated it with in the Entity Registry
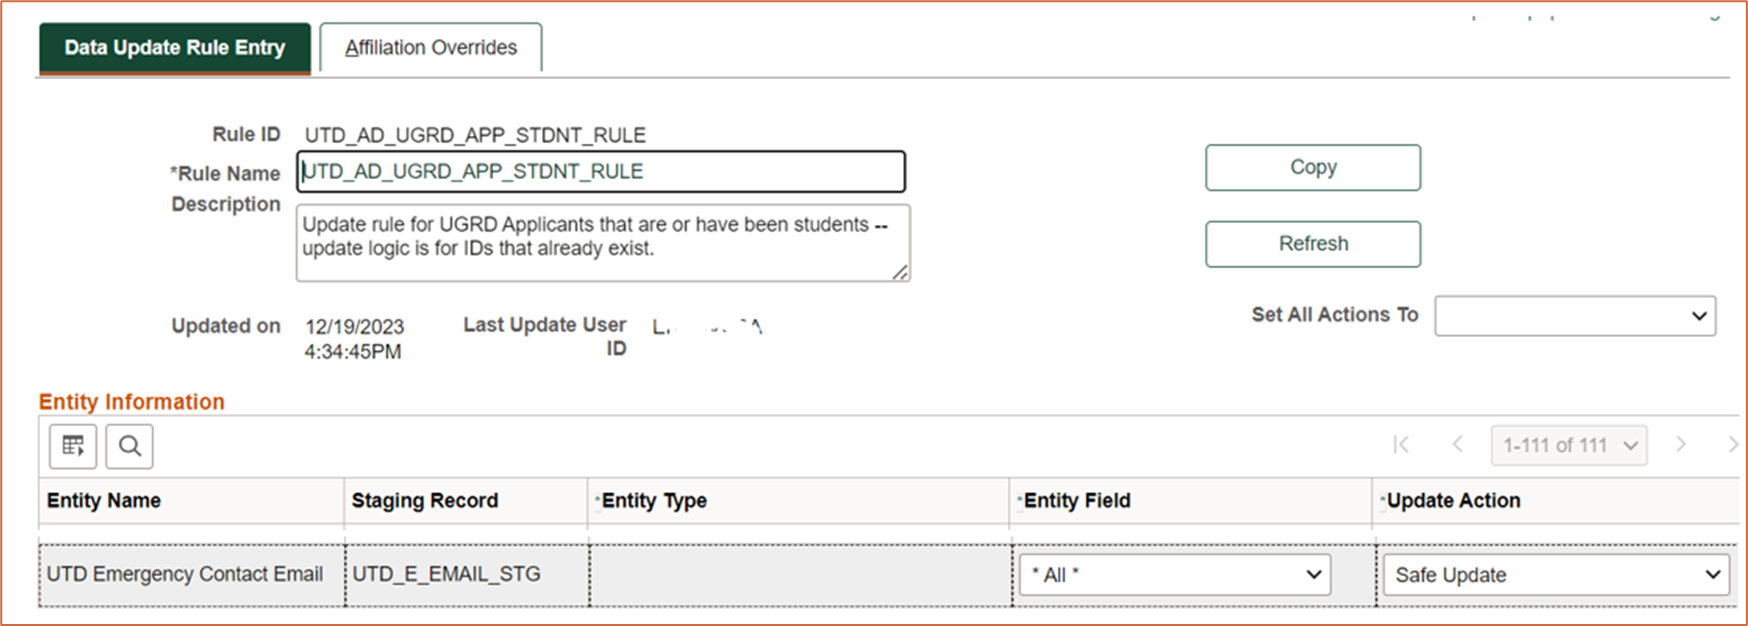
Adding to Data Update Rule:
- You’ll need to refresh in order to see your new table:
Adding to File Mapping:
- You'll map as you would any other table!

Things to keep in mind:
- PDL doesn’t do updates to application data easily – it doesn’t update an existing application number, it can only add new application rows